Sometimes the difference between an OK photo and a great photo comes down to the composition. And while there are compositional guidelines that I teach to my students and apply to my own photography, when it comes right down to it, what makes a composition good can be subjective. In other words, what looks great to one person might look so-so to another. Ultimately, you need to develop your own style and your own comfort with when to follow composition rules and when to break them.
But in order to make art (rather than making a mess) by breaking a rule or two, you need to know the rules first, so here is one: don’t put your subject in the middle of your image. This may sound odd at first. After all, if you’re taking a photo of something, it’s probably because you’ve found it beautiful or interesting or worth remembering. It drew your attention, and now you’re trying to capture it with your camera, presumably because you want to show other people this beautiful or interesting or memorable thing. It is the reason for the photo, so why shouldn’t it be front and center?
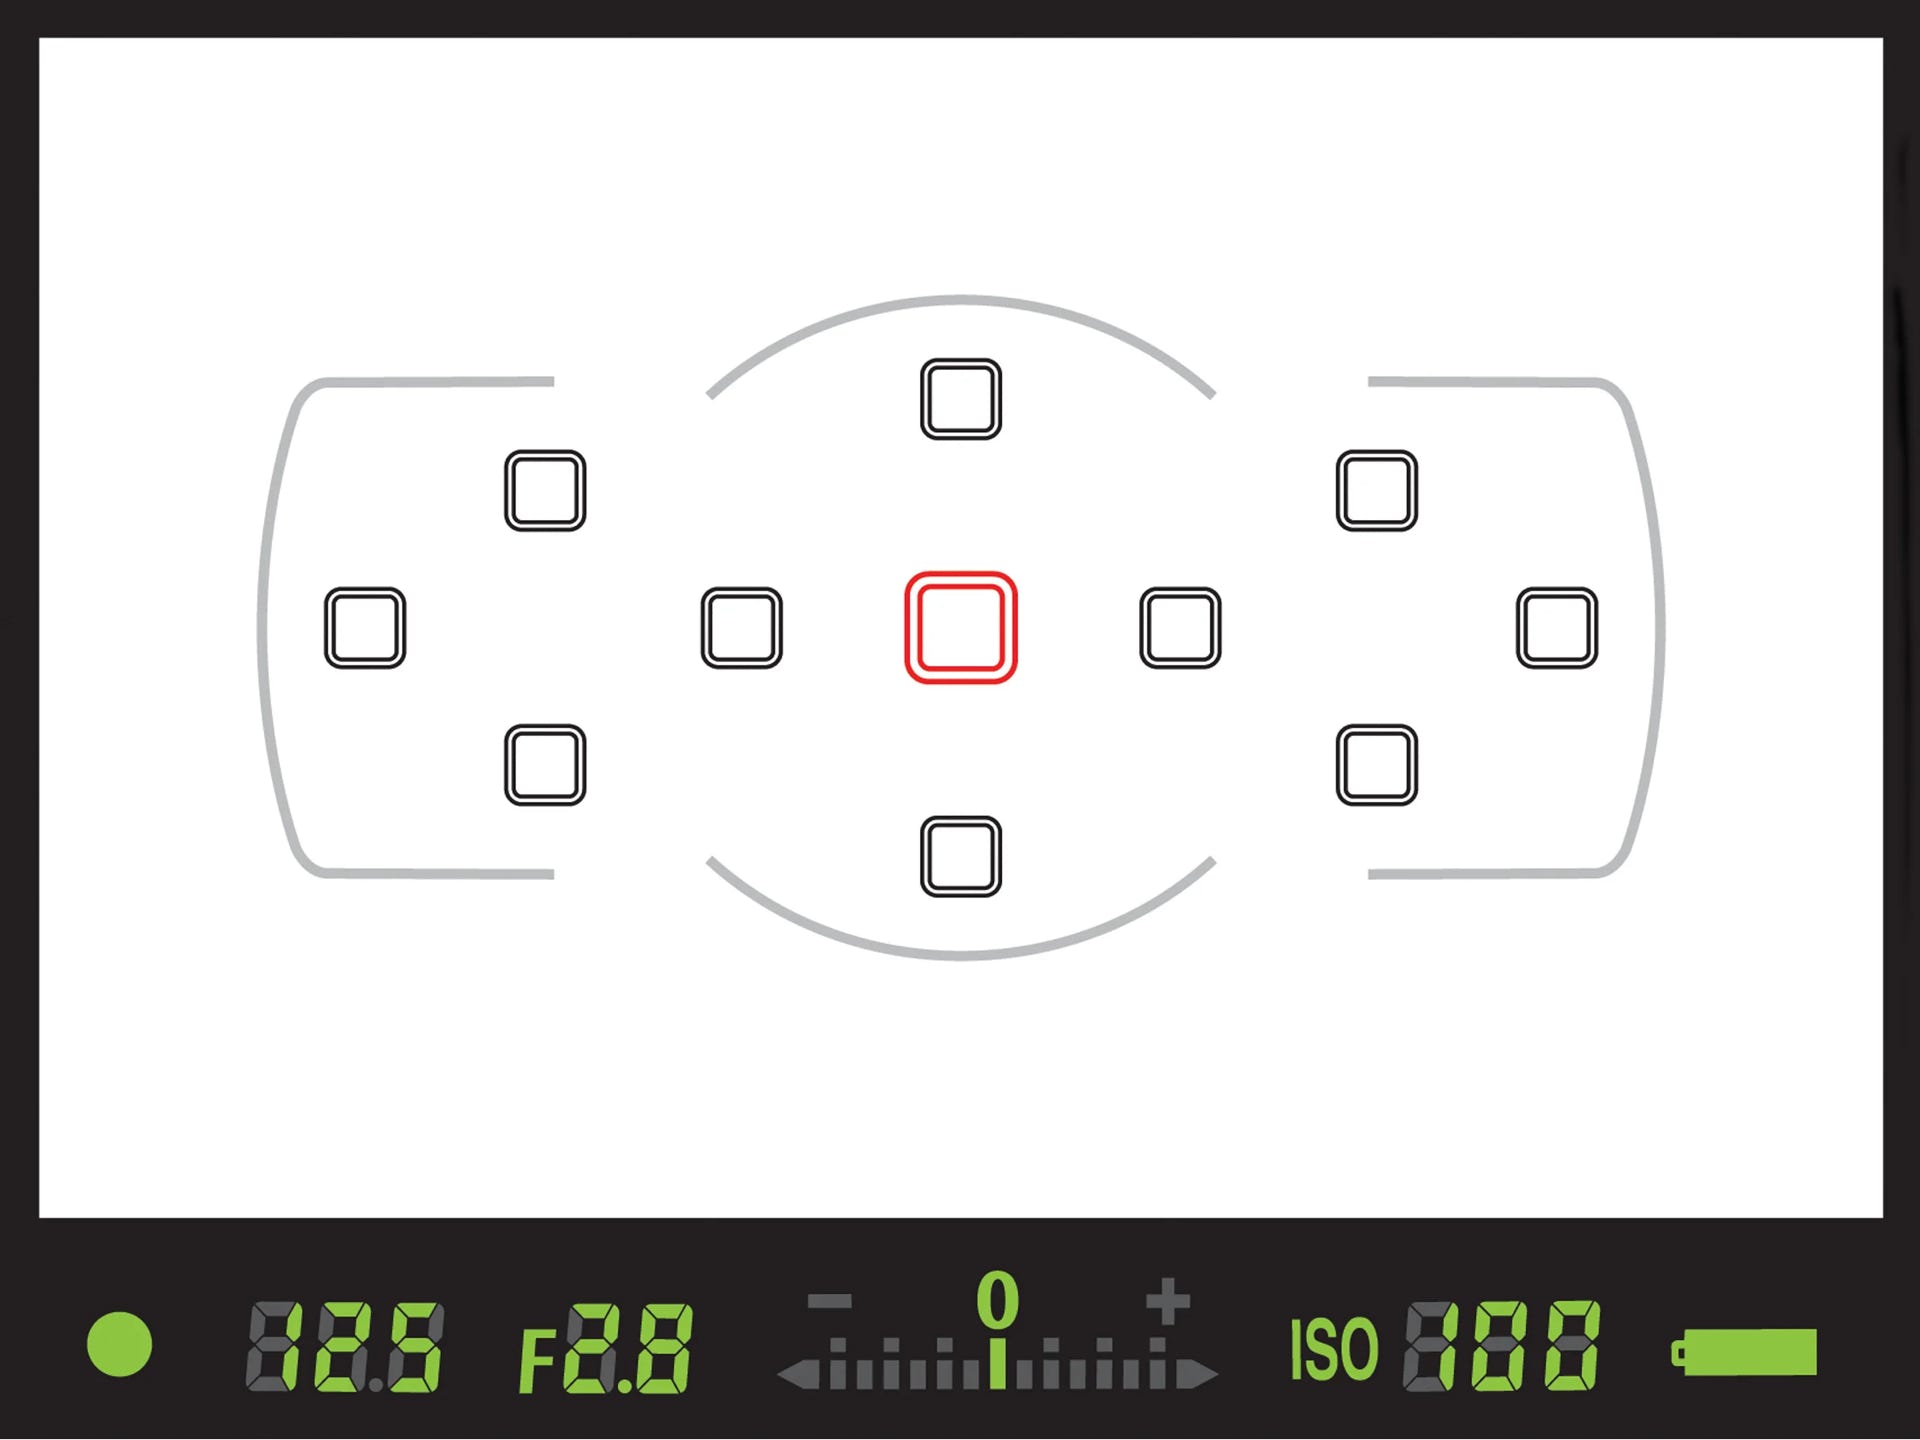
Your camera is even in on the pressure to center your subject. When you look through your viewfinder, you’ll see a cluster of rectangles or circles. Those are called reticles, and when you press the shutter release button on your DSLR halfway down, they light up in order to indicate where your camera is focusing. By default, the camera is set to use that center reticle — the one showing up red below — as its focus point.
So, if your brain is saying “put your subject in the center” and your camera seems to be saying “put your subject in the center,” you may be wondering why I’m saying don’t put your subject in the center.
The answer lies in the difference between taking a snapshot and taking a photo that tells a story. Now, don’t get me wrong: snapshots have their place. They can certainly help you recall people and places and events in your life. If you’ve invested in a DSLR camera, though, and you’re interested enough in photography to be reading this blog, chances are you’re hoping to take photos that go a bit deeper. Landscapes or street scenes that make the viewer feel they are standing right there with you, perhaps. Portraits that capture a person’s personality and not just their likeness, or that give a glimpse of them interacting with their environment.
When you de-center your subject in the frame, it centers that subject in the viewer’s mind in a whole different way.
The compositional guideline we’re talking about is the rule of thirds. If you can picture a 3x3 grid laid over the scene you’re looking at, you’re on your way to understanding the rule of thirds. This imaginary grid divides your field of view into three vertical slices and three horizontal slices. Where the grid lines cross, they create “power points,” and when you place your subject at one of these junctions, it helps you to capture a more compelling image. It’s worth remembering that something can be the center of interest in a photo without being in the center of the photo.
Let’s look at an example:
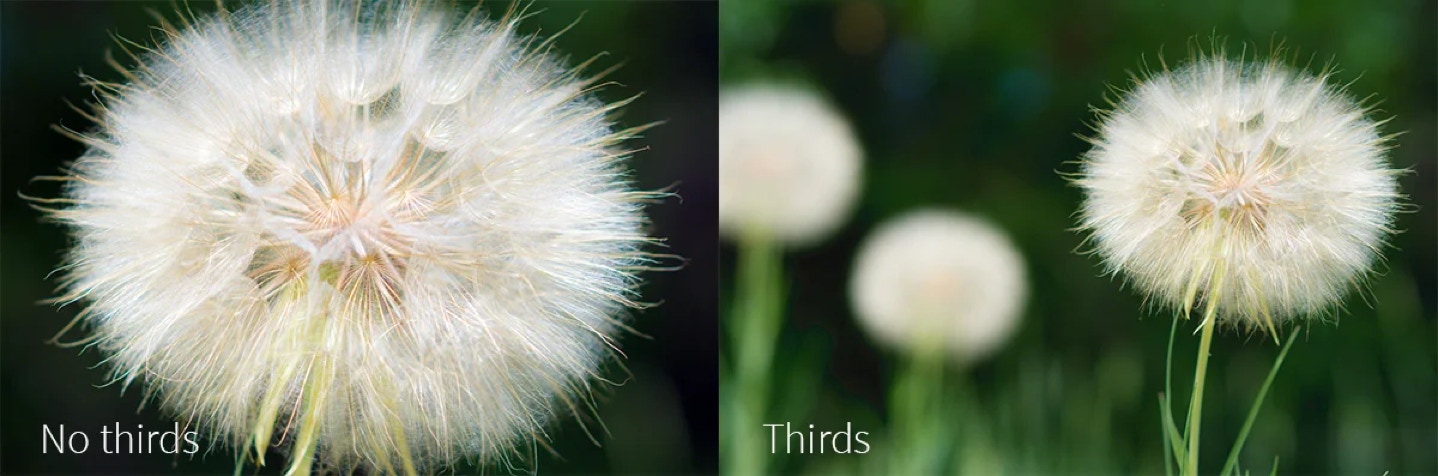
On the left, we have a single dandelion — a common springtime sight. As you can see, it’s smack dab in the middle of the frame. (With not much room for anything else, in fact.) Now, there’s nothing wrong with this photo. Taken at such close range, it shows a lot of detail that you might never have noticed before. It’s nice and clear and crisp, and the fluffy white contrasts nicely with the dark green background. As photos go, it’s just fine. But there is no sense of story there.
On the right is the same dandelion, but zoomed out and placed on one of those power points formed by the imaginary rule-of-thirds grid. Now you can see a couple of the main dandelion’s companions in the background, along with some rough details of foliage and grass. The open space on the left-hand side of the image invites the viewer’s eye to travel through the scene and take in the main dandelion a bit more fully. There’s a bit of story: a green field that is still late-spring lush, but fading into summer. Air that will be filled with dancing bits of fluff carrying their seeds away with the next gust of wind. It’s a bit more interesting — to me, anyway — than the single flower head centered in the frame.
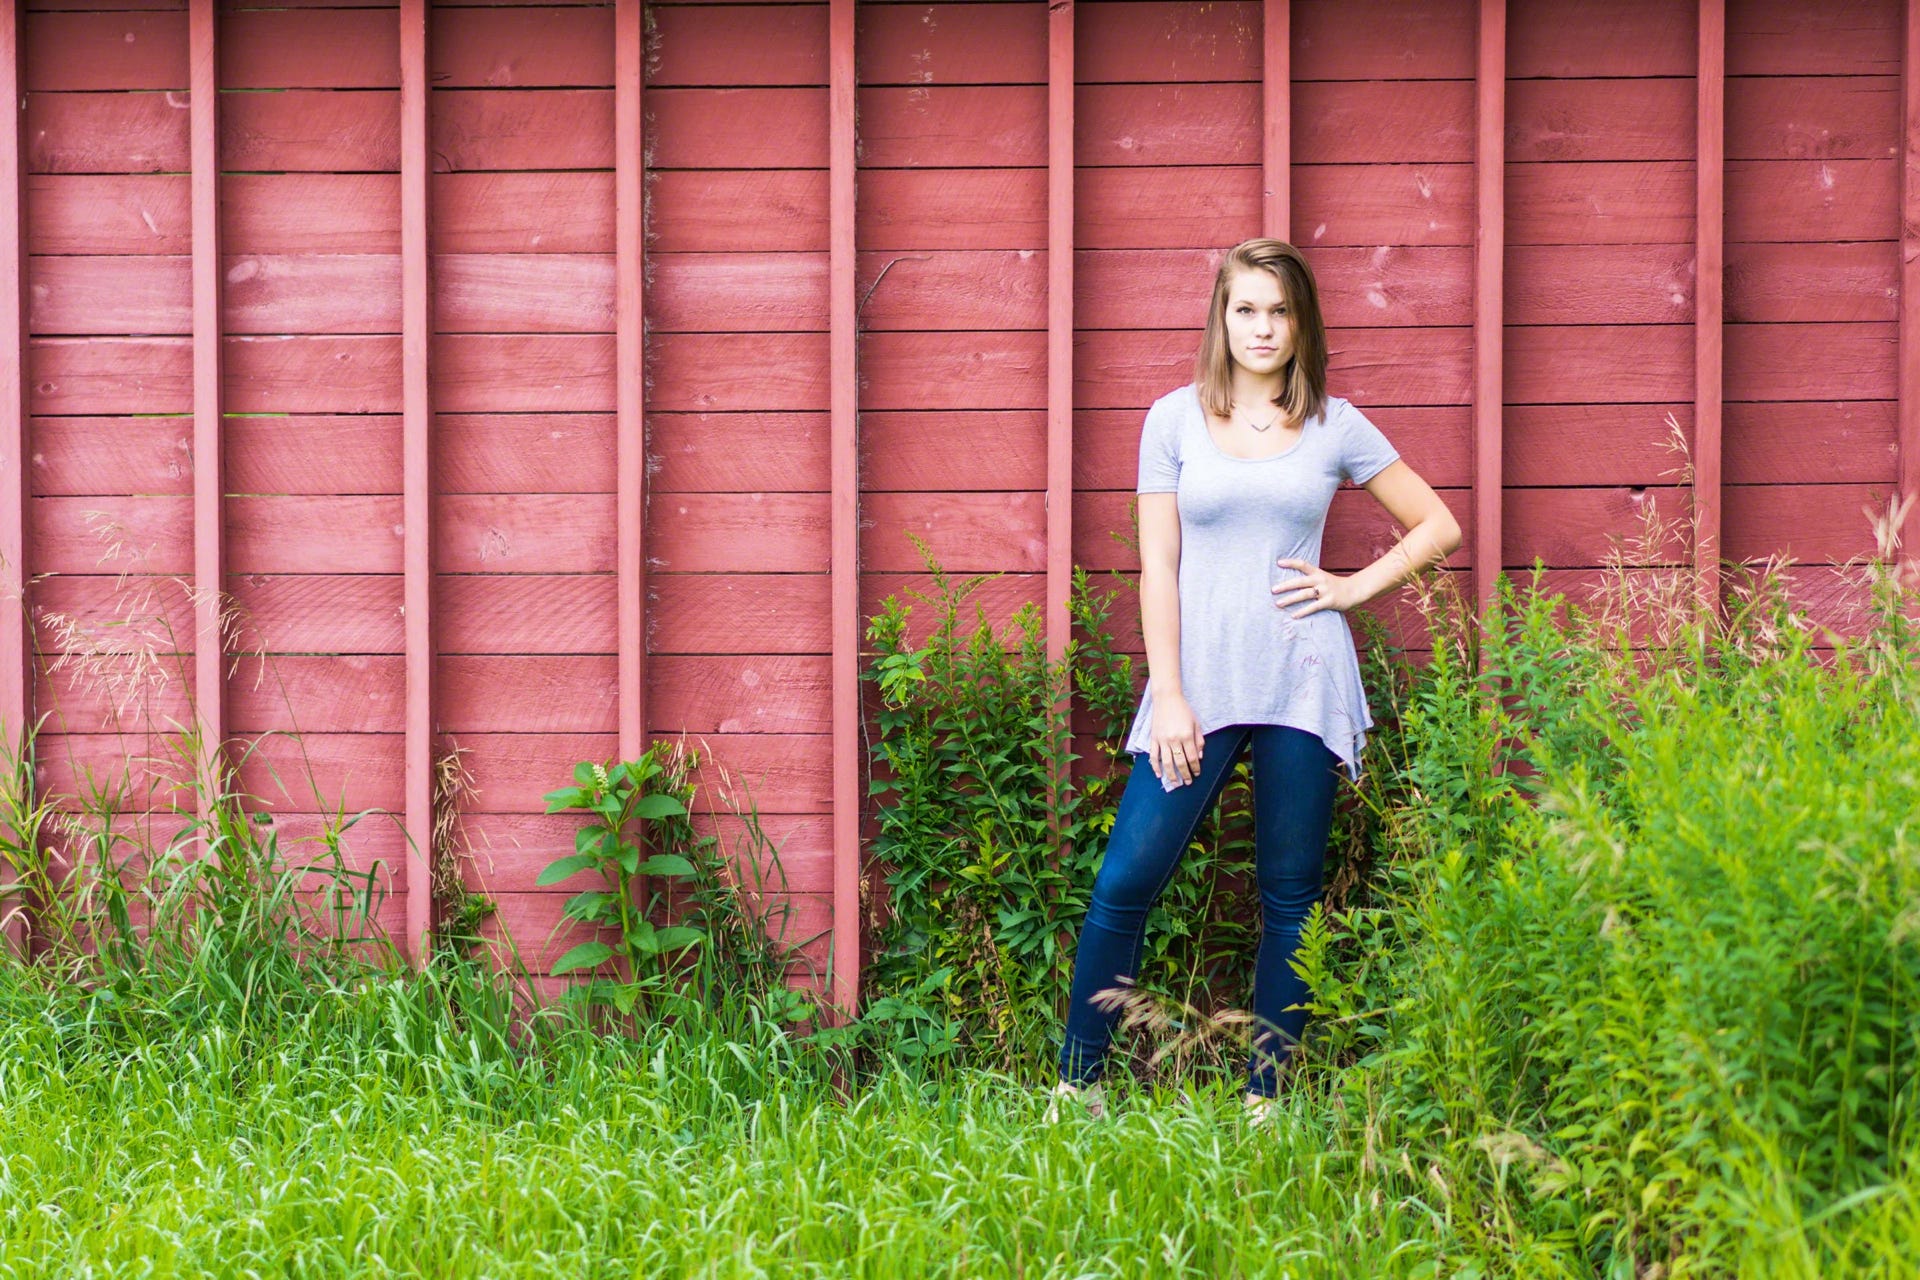
If you find it easier to leave your camera set so that it’s using the center reticle as the focus point, that’s fine. Here’s a neat feature of your DSLR that will come in handy. Use that center reticle to focus on your subject — just as if you were planning to leave them right in the center of the photo. When you press your shutter release button halfway down, your camera system will “wake up,” and the focus reticle will light up to show you where the camera is focusing.

Now, if you continue to hold the shutter button at that halfway point, your focus will stay locked, but you can recompose your image by moving your camera and making sure your subject is off to one side. Once you’ve recomposed the shot to your liking, depress the shutter release button the rest of the way and, ta-da! You have a shot where your subject is in sharp focus without being in the center of the frame. And can you see how the photo below is compositionally stronger than the one above?
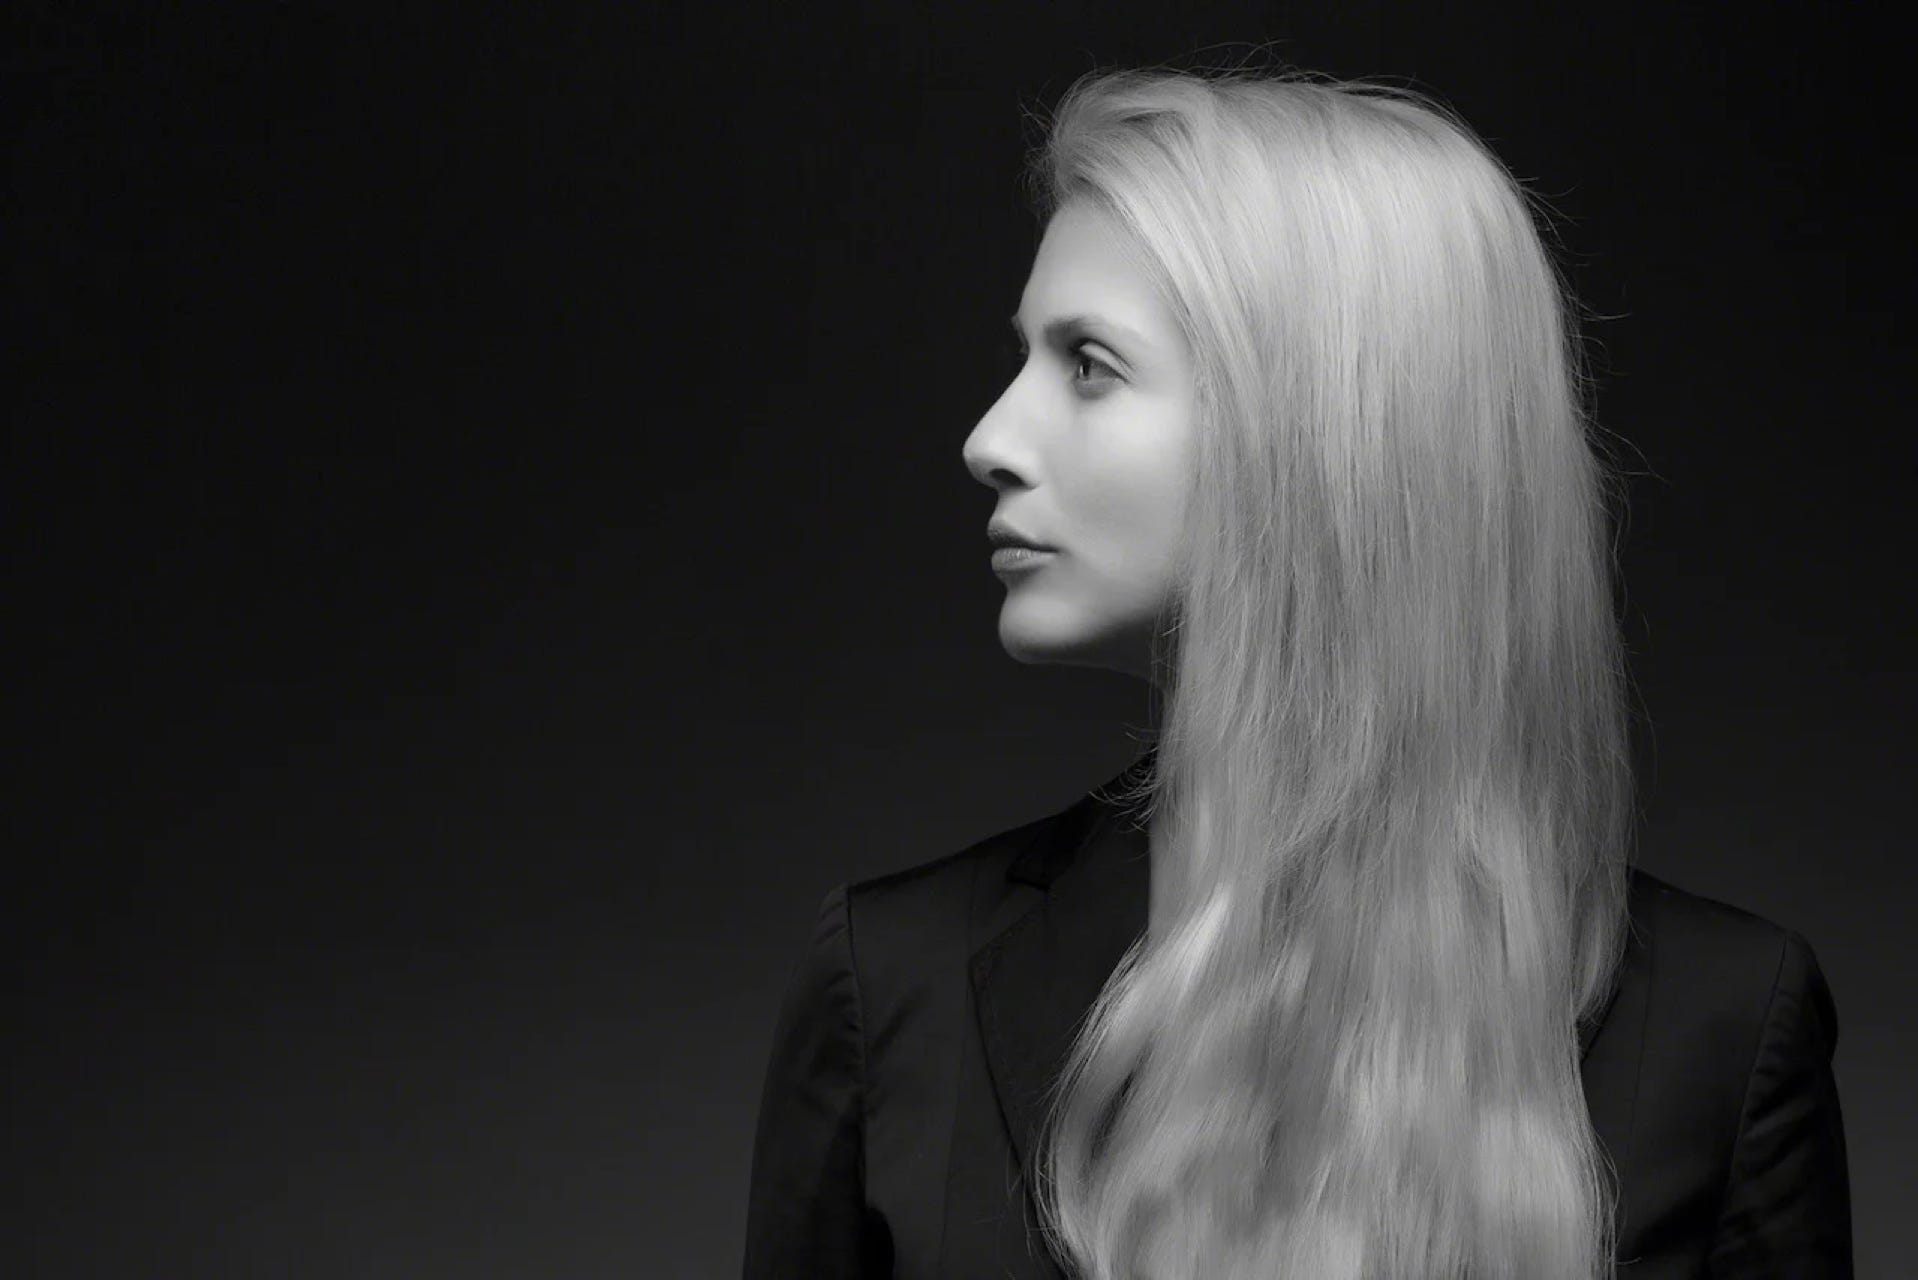
Just remember to be mindful that some subjects have a direction. A vehicle or a person looking off to the side, for example, usually look better if you give them some space to move or look into. That’s part of the story-telling aspect of photography, and that “travel space” for your subject also provides a travel path for the viewer’s eye, drawing them into deeper connection with what you’ve photographed.
I encourage you to play around with this rule of thirds idea. Go try taking 3 photos with the subject in the middle and 3 with the same subject off to one side, and see if you can feel the difference. Take a shot of your favorite vehicle, and see how it tells a different story when there’s space in front of it (in the direction of travel) rather than behind it. It can take a while to develop your creative eye, and there’s no better way to start that process than practice, practice, practice.
If you think some guided practice and more detail about compositional guidelines, including the rule of thirds, might be helpful to you, you can join us for Photography 2. We explore color, composition, story-telling, rule-breaking, and more. And if you think that every good rule deserves an exception, check out The Middle Reloaded to see just how right you are (and why).
