TL;DR: While breaking all the rules all the time feels and looks messy, it can be highly effective to break a selected few rules now and again.
Rule of thirds, rule of sunny 16, rule of large numbers, rule of unintended consequences. Don't exceed 55, don't change lanes in intersections, don't park where prohibited. Our world is defined by rules, and sometimes it feels like we're trapped in a web of them. When you start learning photography, you'll find there are lots of rules there, too. It's no surprise that many photographers yearn to break free from these constraints. "I don't like all the rules. I want to break the rules" is a sentiment I hear sometimes.
And I get it. Sometimes I want to throw out the rules and do whatever I feel like in the moment, too. But there's something important to remember: rules typically exist for good reasons. Some ensure our safety and the safety of others, while others represent time-tested wisdom discovered by those who came before us. Granted, photography rules aren't usually life-and-death (unless you're on safari and ignore the "don't get too close to the lions" rule, maybe). They do exist for a reason, though, and are based on centuries of artistic theory.
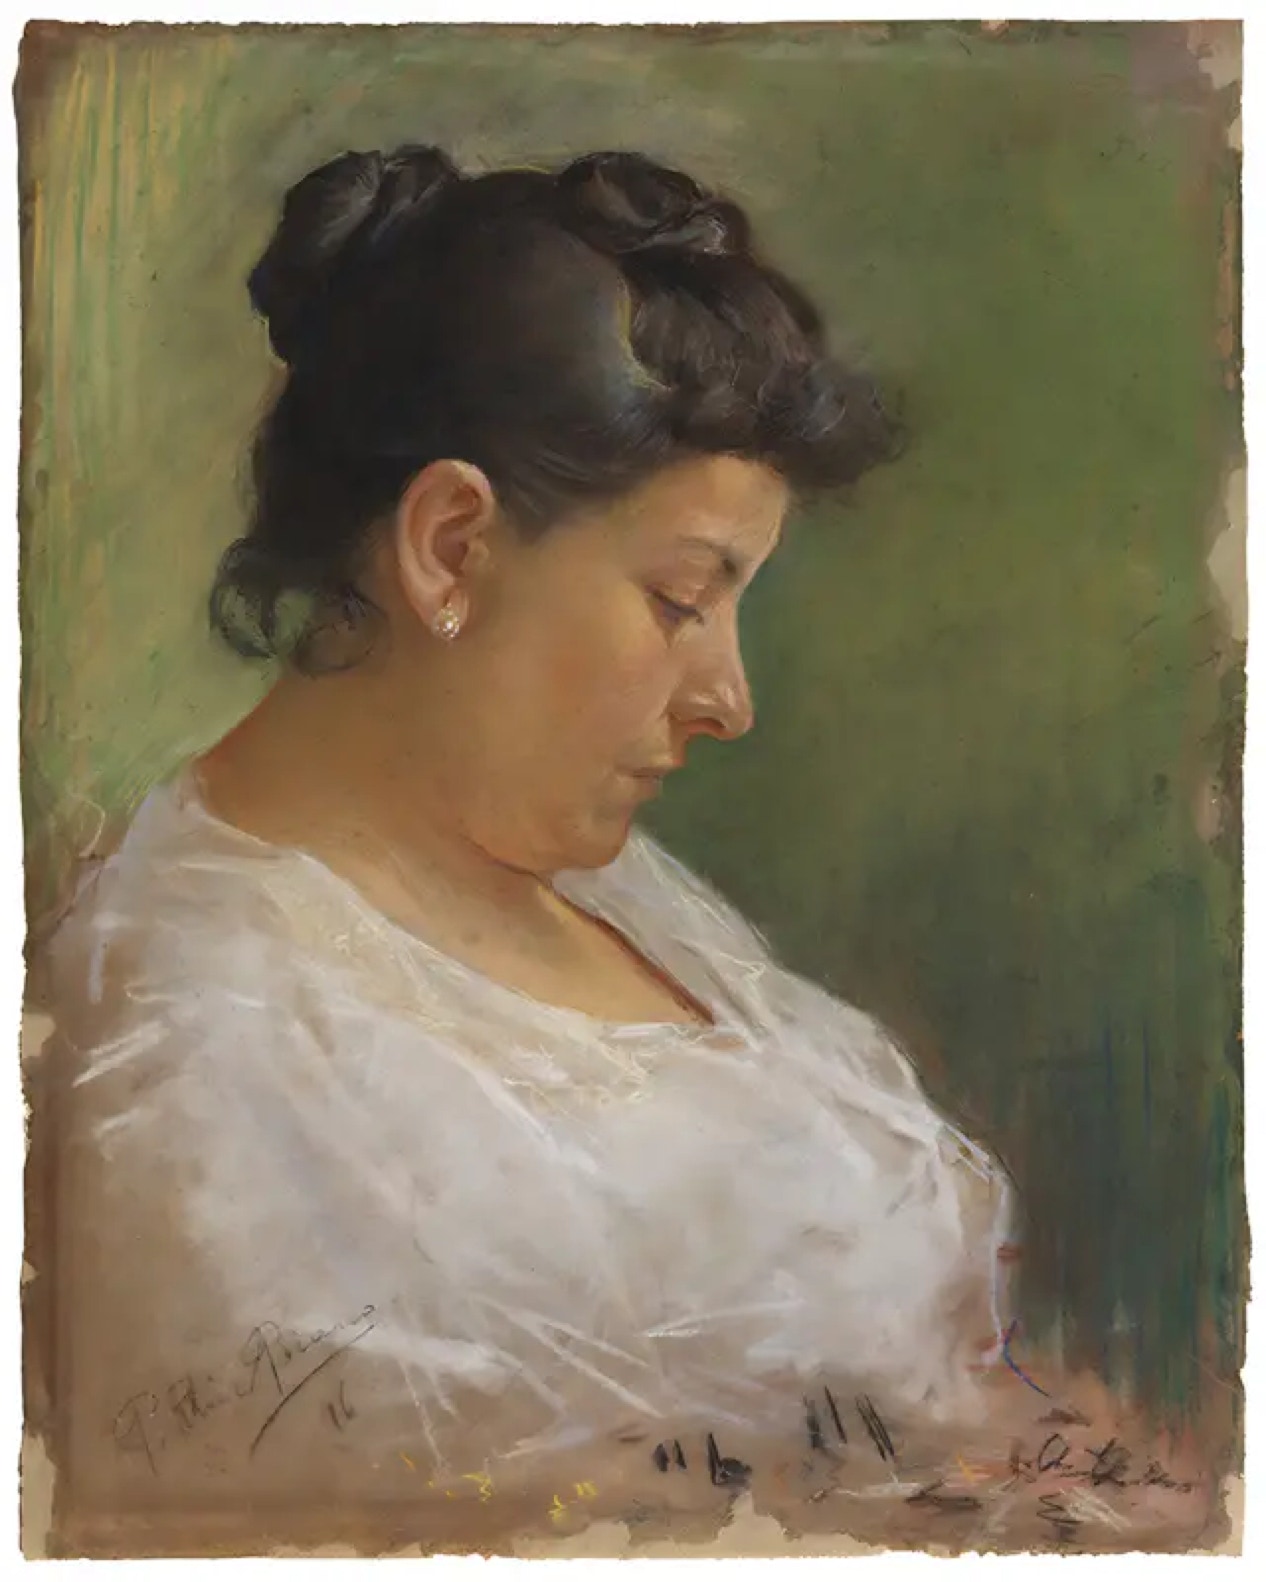
Consider Pablo Picasso – before creating his revolutionary abstract works, he painted a traditional portrait of his mother. He mastered the fundamentals before transcending them. This deep understanding allowed him to break rules with intention and purpose rather than at random.
When you want to break photographic rules, ask yourself: Have you first taken the time to understand them? Or are you seeking to bypass the learning process entirely and jump straight to rule-breaking? If it's the latter, you're essentially admitting you don't care enough about photography to invest in understanding the basic principles of photography as an art form. Instead, you're hoping blind luck will somehow produce meaningful results. If you're invested enough to enroll in a photography course, though, it tells me that you want to improve, that you want your photographs to be works of art and not just snapshots. You're really doing yourself a disservice if you don't take the time to understand the rules. And if you break the rules without learning them first, you're more likely to make a mess than a revolutionary artistic statement.
True artistic rebellion requires knowledge of what you're rebelling against.
Here is what you can do, though: Take each rule in photography and composition and study it.
1. Why would it be a rule in the first place?
2. What does it do to photographs?
3. How is it helping or hurting a photograph?
After you have studied a rule and answered these questions, you can go ahead and break it. Only that one, though. Now answer this:
1. How is it different now?
2. What does this do to your photograph?
3. How is this helping or hurting?
If you’d like to learn more about the rules of photographic composition — and get some guided practice in breaking them for creative effect — you might want to consider joining our Photography 2 course. We dive deep into all of that, and more.
Have you ever heard the saying that there's an exception for every rule? Well, the rule of thirds is no exception.
(If you haven't read our post about Middle Management, aka how to use the rule of thirds to create stronger, more compelling images, go check that out first before you read any further.)
By now, you've had it drummed into you, whether from reading our blog post or taking our courses or some mix of the two, that the best place for your subject is not in the middle, but rather near one of those "power points" created by imagining a three-by-three grid superimposed over what you see through the view finder of your camera. And hopefully, you also have a handle on the concept of leaving your subject some space to move or gaze into, to give life and an element of story-telling to a static image.
Here's the part where I tell you when and why to forget all that and place your subject right in the middle of the frame. The key is one word: symmetry. In cases where you are photographing something (or someone) whose two halves mirror each other, the middle is the place for them to be. By its very nature, symmetry gives a strong sense of balance. Placing a subject that is so perfectly balanced in an off-center position would simply look and feel wrong. And, generally speaking, a symmetrical subject lends itself to a sense of stability and grounding. It doesn't require space to move into, because the story it is telling is more about serenity and stillness than about dynamic movement.
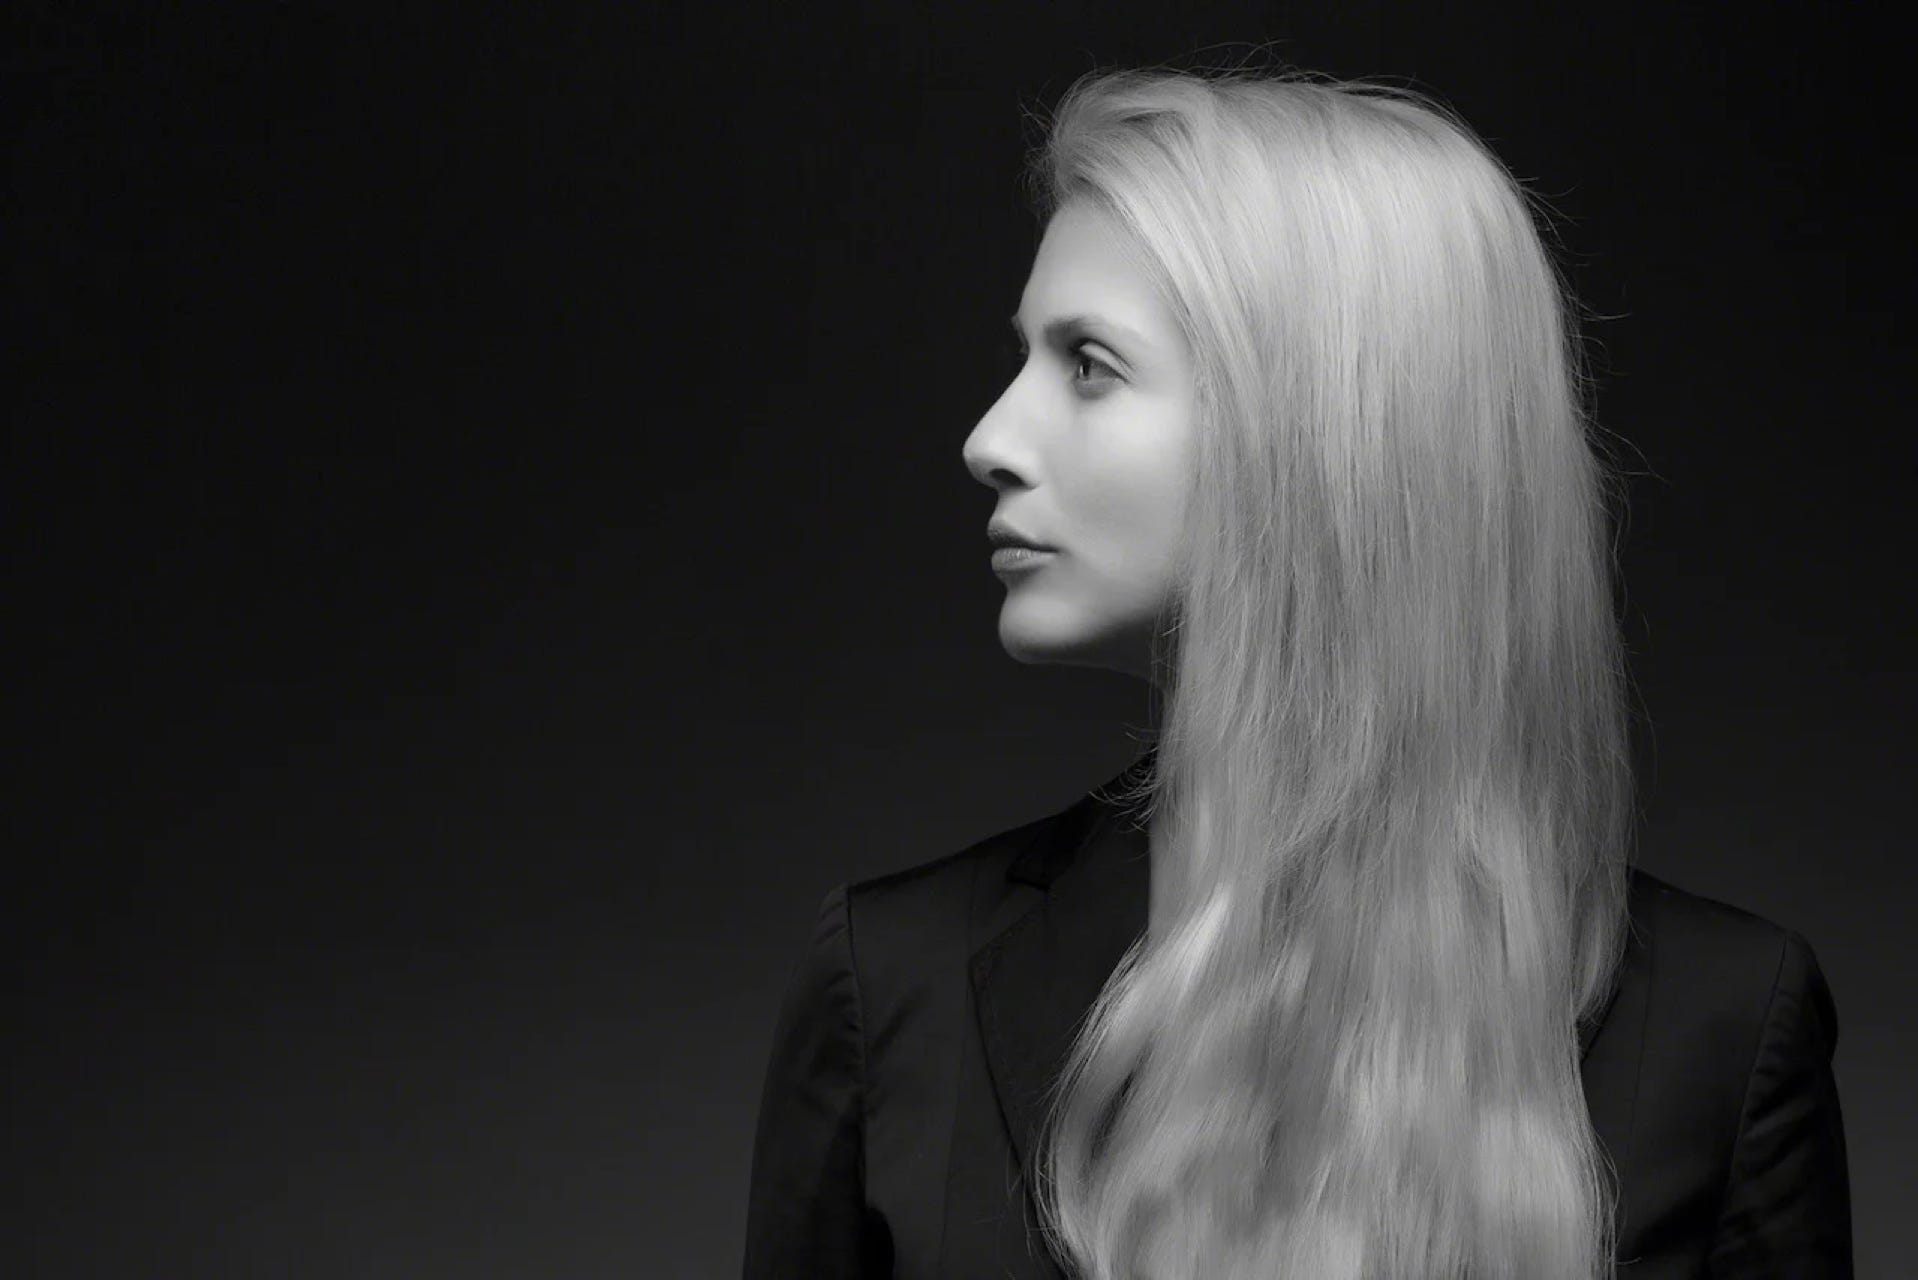
To take this from the abstract, let's look at an example:
You can see, I hope, the symmetry of this lovely model's pose. It's not quite perfect symmetry, but it's close enough to it that putting her off to one side of the frame or the other would look strange. The sense of a centered balance is enhanced by the fact that she's gazing down, rather than having her head turned to one side or the other. And, of course, the rays of light cascading from above in a symmetrical fan help also.
When I choose to put a subject in the center of a photo, it's because the symmetry is so overwhelmingly obvious to me that I almost can't make another choice. So, my advice is to pay close attention, train your artist's eye, learn to see when you have a symmetrical subject -- and only then to break the rule of thirds. It does take some practice and maybe some trial and error. The good news is that editing software lets you play around with different image crops, as long as you've shot your photo with enough space around the subject to work with. If you suspect you've captured a strongly symmetrical image, experiment with putting it in the center of your image vs. on one of the rule of thirds lines.
And if you find yourself befuddled or like you don't know how to judge symmetry vs. asymmetry, you might consider taking one or more of our photography courses. In Photography 2, we talk all about photographic composition, including the concept of symmetry.
Is your camera bored, depressed, and moping around? Does it feel sad, lonely, neglected, or abandoned?
This may help: Join us for the 52 weeks, 52 wonders photo challenge. If this sounds intriguing, read on.
I love going out and taking photos, primarily when things work out and I capture something worthwhile. Exploring our world through the lens of a camera often connects me with locations in ways that are deeper and more meaningful than if I weren't looking through a viewfinder. I cherish that connection. I love it. I crave more of it. If you feel similar, the 52 weeks, 52 wonders challenge will hopefully motivate you each week to connect with your world and your camera. It'll be good for you. It'll be good for your camera.
If there's any one piece of advice I give over and over when people ask me how they can improve their photography, it's: practice, practice, practice. All of our courses aim to get you sure-footed enough with the material we teach so that you can continue learning and exploring outside of the classroom. To be able to do that well, though, you do need to keep your skills sharp. And it'll make your camera happy, too.
As with any creative pursuit, even things we love doing and that bring us joy, it can be easy to put off the practice of photography until "later" in favor of taking care of daily obligations and never-ending to-do lists. Without a reason to regularly pick up your camera, it can sometimes be hard for even the most passionate photographer to motivate themselves to get out there and hone their craft.
We hope our 52 Weeks 52 Wonders Challenge can be the solution to this conundrum.
What is it?
Every week, we'll post a photography prompt in our NH Photo Ninjas Facebook group. Your mission, if you choose to accept it, is to photograph something wonderful each week that fits the week's theme -- and, of course, share it in the group to inspire and delight your fellow photographers.
Who can participate?
Anyone! You will need to join the NH Photo Ninjas group on Facebook, of course, but otherwise there is no gate-keeper, no secret code, and no barrier to joining. Other great stuff happens in that group, too, that may further inspire and encourage your photographic creativity.
What are the rules?
Follow the prompt, which we'll post once a week. It is up to you to interpret the weekly theme and craft a photo. Post your image to the group by Sunday night. It would be helpful if you could add the hashtags #52Wonders #NHphotoninjas #C1Macademy and a hashtag with the week's theme to your post.
We do ask that you post only one image per week to make sure everyone's photo gets the space it deserves to be admired. (And that's part of the challenge, too ... narrowing it down to your very favorite theme-specific image, if you're a prolific shutterbug!) Outside the 52 weeks 52 wonders challenge you can post as many photos as you like.
What if you feel stuck?
This is meant to be fun ... just a little nudge to flex your creative muscles and knock the rust off your photography skills. If you ever have questions or need guidance, we're here to help. Email or call. We've got you.
Sometimes the difference between an OK photo and a great photo comes down to the composition. And while there are compositional guidelines that I teach to my students and apply to my own photography, when it comes right down to it, what makes a composition good can be subjective. In other words, what looks great to one person might look so-so to another. Ultimately, you need to develop your own style and your own comfort with when to follow composition rules and when to break them.
But in order to make art (rather than making a mess) by breaking a rule or two, you need to know the rules first, so here is one: don’t put your subject in the middle of your image. This may sound odd at first. After all, if you’re taking a photo of something, it’s probably because you’ve found it beautiful or interesting or worth remembering. It drew your attention, and now you’re trying to capture it with your camera, presumably because you want to show other people this beautiful or interesting or memorable thing. It is the reason for the photo, so why shouldn’t it be front and center?
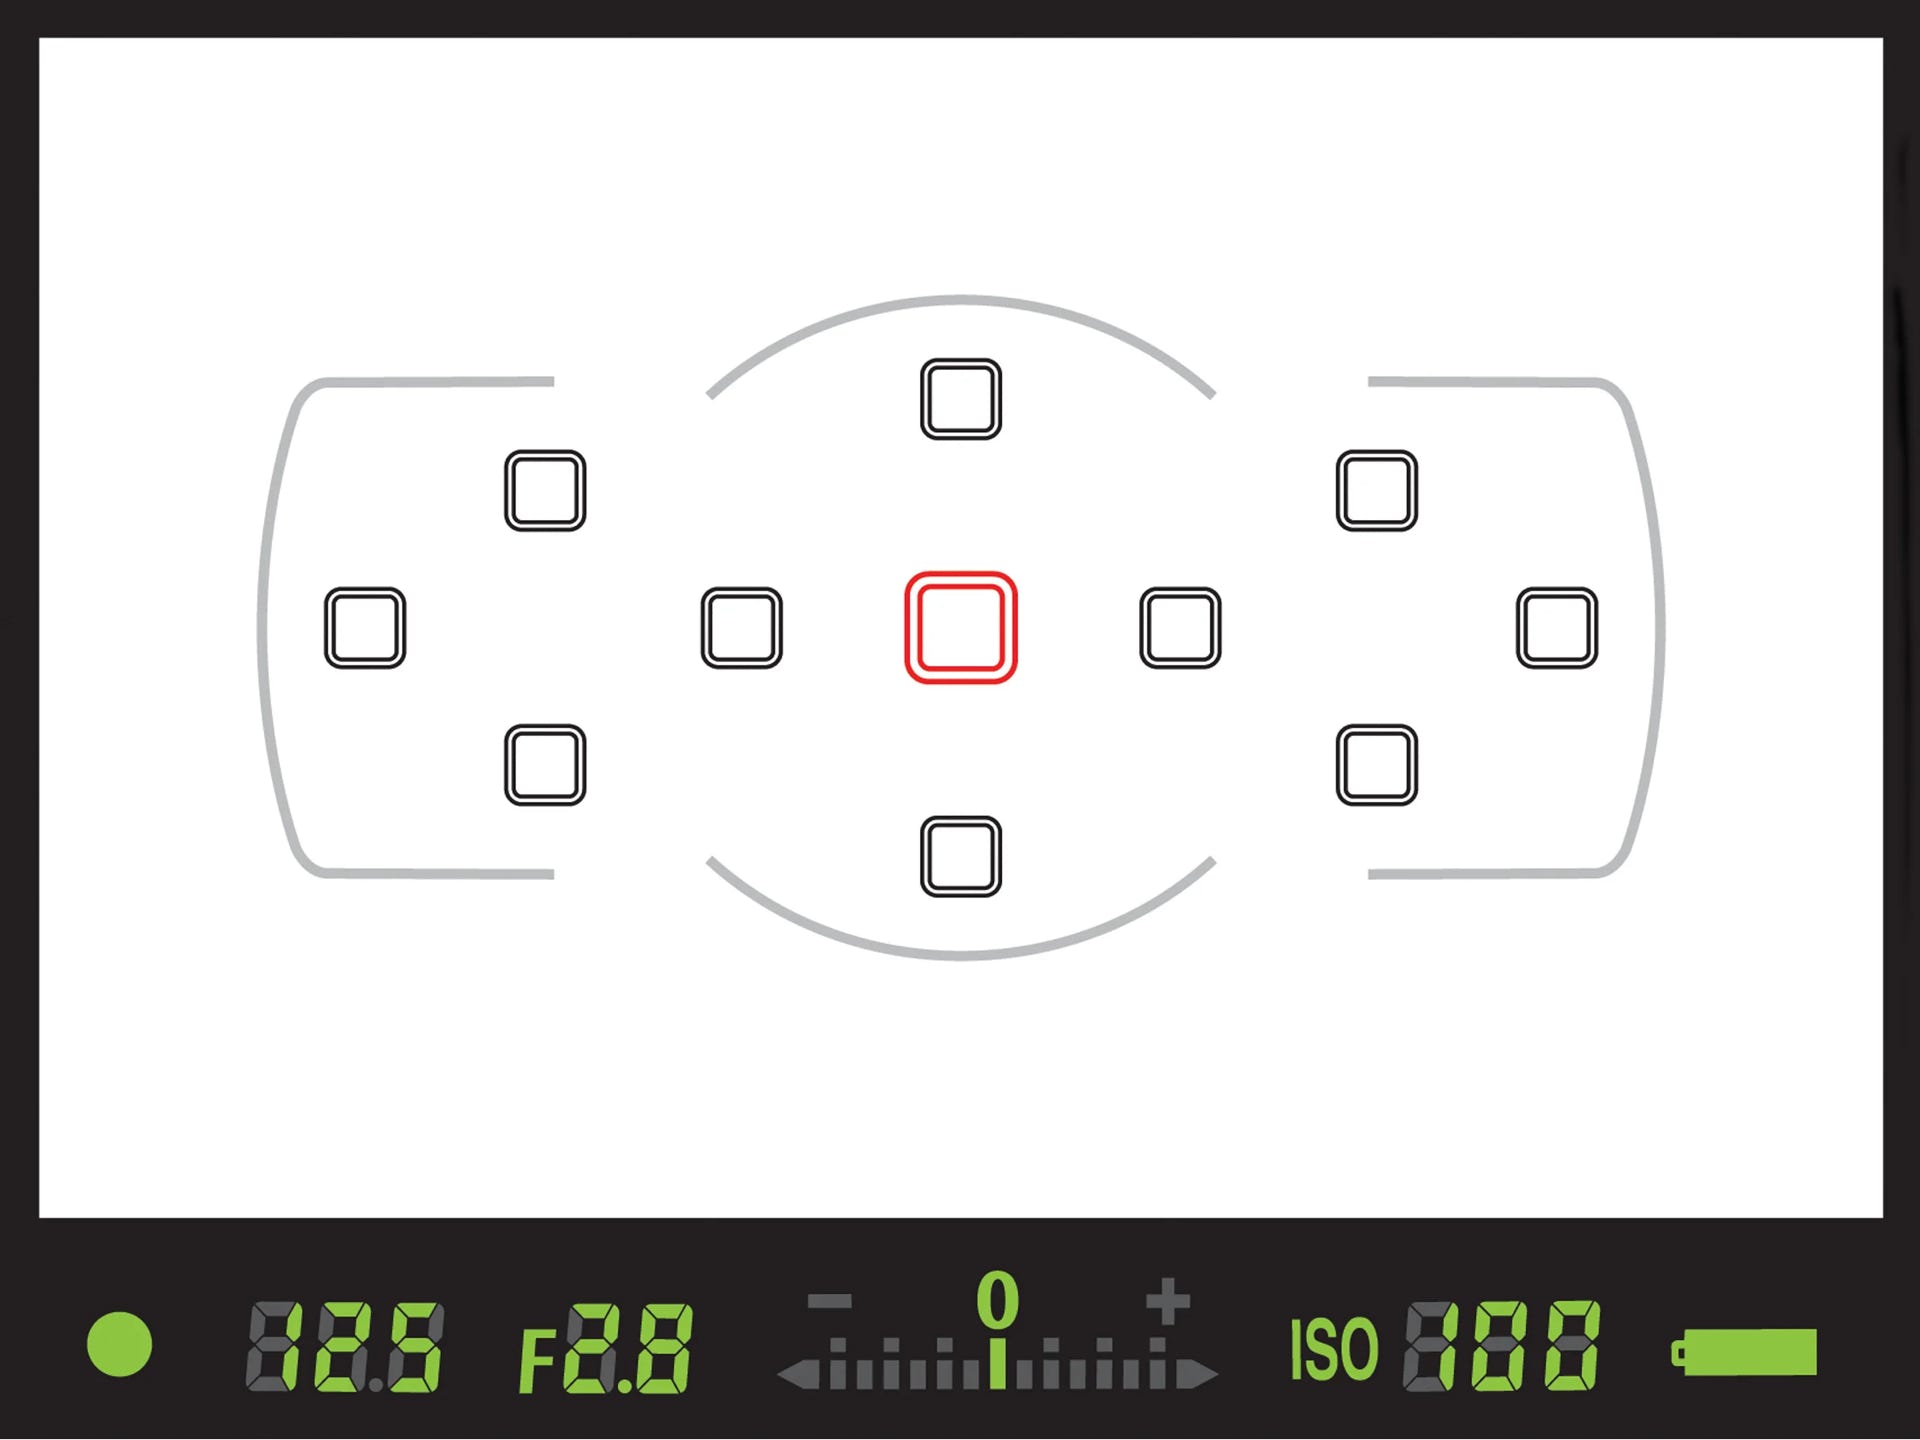
Your camera is even in on the pressure to center your subject. When you look through your viewfinder, you’ll see a cluster of rectangles or circles. Those are called reticles, and when you press the shutter release button on your DSLR halfway down, they light up in order to indicate where your camera is focusing. By default, the camera is set to use that center reticle — the one showing up red below — as its focus point.
So, if your brain is saying “put your subject in the center” and your camera seems to be saying “put your subject in the center,” you may be wondering why I’m saying don’t put your subject in the center.
The answer lies in the difference between taking a snapshot and taking a photo that tells a story. Now, don’t get me wrong: snapshots have their place. They can certainly help you recall people and places and events in your life. If you’ve invested in a DSLR camera, though, and you’re interested enough in photography to be reading this blog, chances are you’re hoping to take photos that go a bit deeper. Landscapes or street scenes that make the viewer feel they are standing right there with you, perhaps. Portraits that capture a person’s personality and not just their likeness, or that give a glimpse of them interacting with their environment.
When you de-center your subject in the frame, it centers that subject in the viewer’s mind in a whole different way.
The compositional guideline we’re talking about is the rule of thirds. If you can picture a 3x3 grid laid over the scene you’re looking at, you’re on your way to understanding the rule of thirds. This imaginary grid divides your field of view into three vertical slices and three horizontal slices. Where the grid lines cross, they create “power points,” and when you place your subject at one of these junctions, it helps you to capture a more compelling image. It’s worth remembering that something can be the center of interest in a photo without being in the center of the photo.
Let’s look at an example:
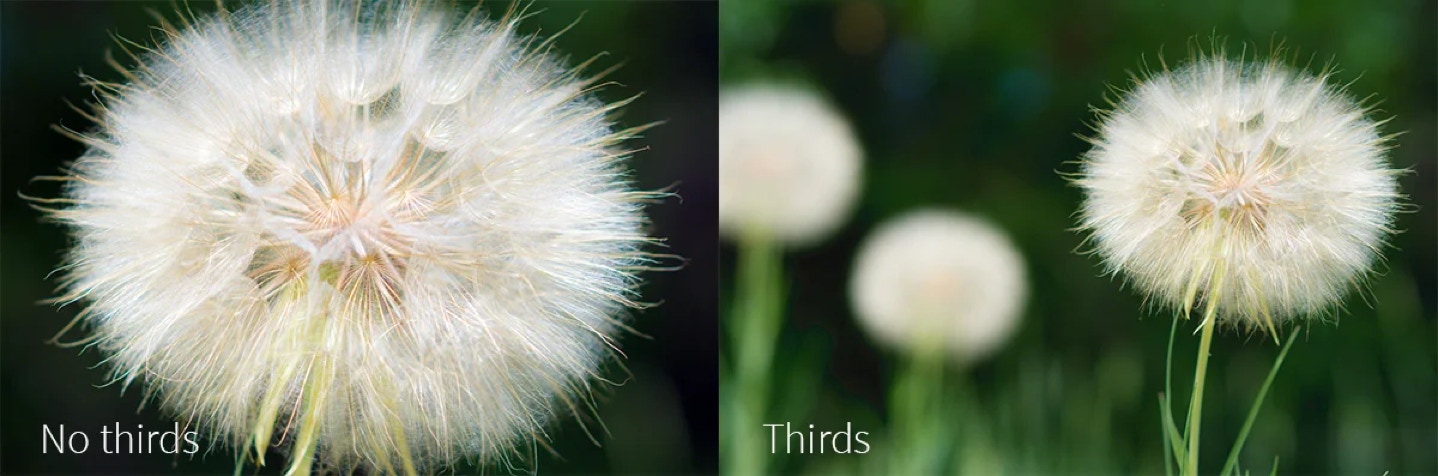
On the left, we have a single dandelion — a common springtime sight. As you can see, it’s smack dab in the middle of the frame. (With not much room for anything else, in fact.) Now, there’s nothing wrong with this photo. Taken at such close range, it shows a lot of detail that you might never have noticed before. It’s nice and clear and crisp, and the fluffy white contrasts nicely with the dark green background. As photos go, it’s just fine. But there is no sense of story there.
On the right is the same dandelion, but zoomed out and placed on one of those power points formed by the imaginary rule-of-thirds grid. Now you can see a couple of the main dandelion’s companions in the background, along with some rough details of foliage and grass. The open space on the left-hand side of the image invites the viewer’s eye to travel through the scene and take in the main dandelion a bit more fully. There’s a bit of story: a green field that is still late-spring lush, but fading into summer. Air that will be filled with dancing bits of fluff carrying their seeds away with the next gust of wind. It’s a bit more interesting — to me, anyway — than the single flower head centered in the frame.
If you find it easier to leave your camera set so that it’s using the center reticle as the focus point, that’s fine. Here’s a neat feature of your DSLR that will come in handy. Use that center reticle to focus on your subject — just as if you were planning to leave them right in the center of the photo. When you press your shutter release button halfway down, your camera system will “wake up,” and the focus reticle will light up to show you where the camera is focusing.
Now, if you continue to hold the shutter button at that halfway point, your focus will stay locked, but you can recompose your image by moving your camera and making sure your subject is off to one side. Once you’ve recomposed the shot to your liking, depress the shutter release button the rest of the way and, ta-da! You have a shot where your subject is in sharp focus without being in the center of the frame. And can you see how the photo below is compositionally stronger than the one above?
Just remember to be mindful that some subjects have a direction. A vehicle or a person looking off to the side, for example, usually look better if you give them some space to move or look into. That’s part of the story-telling aspect of photography, and that “travel space” for your subject also provides a travel path for the viewer’s eye, drawing them into deeper connection with what you’ve photographed.
I encourage you to play around with this rule of thirds idea. Go try taking 3 photos with the subject in the middle and 3 with the same subject off to one side, and see if you can feel the difference. Take a shot of your favorite vehicle, and see how it tells a different story when there’s space in front of it (in the direction of travel) rather than behind it. It can take a while to develop your creative eye, and there’s no better way to start that process than practice, practice, practice.
If you think some guided practice and more detail about compositional guidelines, including the rule of thirds, might be helpful to you, you can join us for Photography 2. We explore color, composition, story-telling, rule-breaking, and more. And if you think that every good rule deserves an exception, check out The Middle Reloaded to see just how right you are (and why).
Head outside with your camera. Set it to Manual mode. (That's M on the MASP or M Av Tv P selector.)
Since you're outside, set your whitebalance to Cloudy. Next, set your shutter speed to 1/500, your aperture to ƒ/8, and choose auto-ISO. Most of the time, these settings will give you solid, repeatable, pleasing results.
For the next 15 seconds, photograph something pretty or interesting. And we'd love to see your results, so please post the one you like best to our FaceBook photography community group page.
Of course, some photography situations are more complicated, and sometimes those "start here" settings won't quite do the job. To really understand your camera's systems, how they work together to create a properly exposed photo, and how to adjust when you're not getting the results you want, come to our Photography-1 course.
If you find these tips helpful, why not share them with a friend?